Badges & Check-in
Badges are your attendees’ all-access pass to your events, ensuring a smooth and organized check-in process. Once attendees purchase a product, a unique badge containing their name, company, and a QR or barcode is generated. These badges can be printed ahead of time or picked up at the event, making check-in quick and hassle-free.
At events, attendees scan their badges at the check-in area, allowing you to track attendance in real-time and control access to specific sessions or areas. Badges not only streamline the check-in process but also foster networking by clearly displaying attendee information.
View and add badges for your products
From the Products menu, you can view and edit event badges.
From Products > Badges, you can view and filter all current badges. Here you can see the name, description, slag and count of each active badge. Below this section you will see a section to add new badges, titled Add New Tags.

Add new badge
In the Add New Tag section, you can name, customize, and save your new badge.

Follow these simple steps to add a badge for your event:
1. Enter Badge Name
In the “Name” field, type the name of the badge. This is how the badge will appear on your site.
2. Select Badge Layout
Choose your preferred badge size and template. These are measured by inches.
3. Choose Badge Orientation
Pick either Landscape or Portrait for the badge’s orientation.
4. Add a Background Image
Click Add Image to upload a background image for the badge. Ensure the image is 1200 x 900 px for optimal quality. The background image will cover the entire badge.
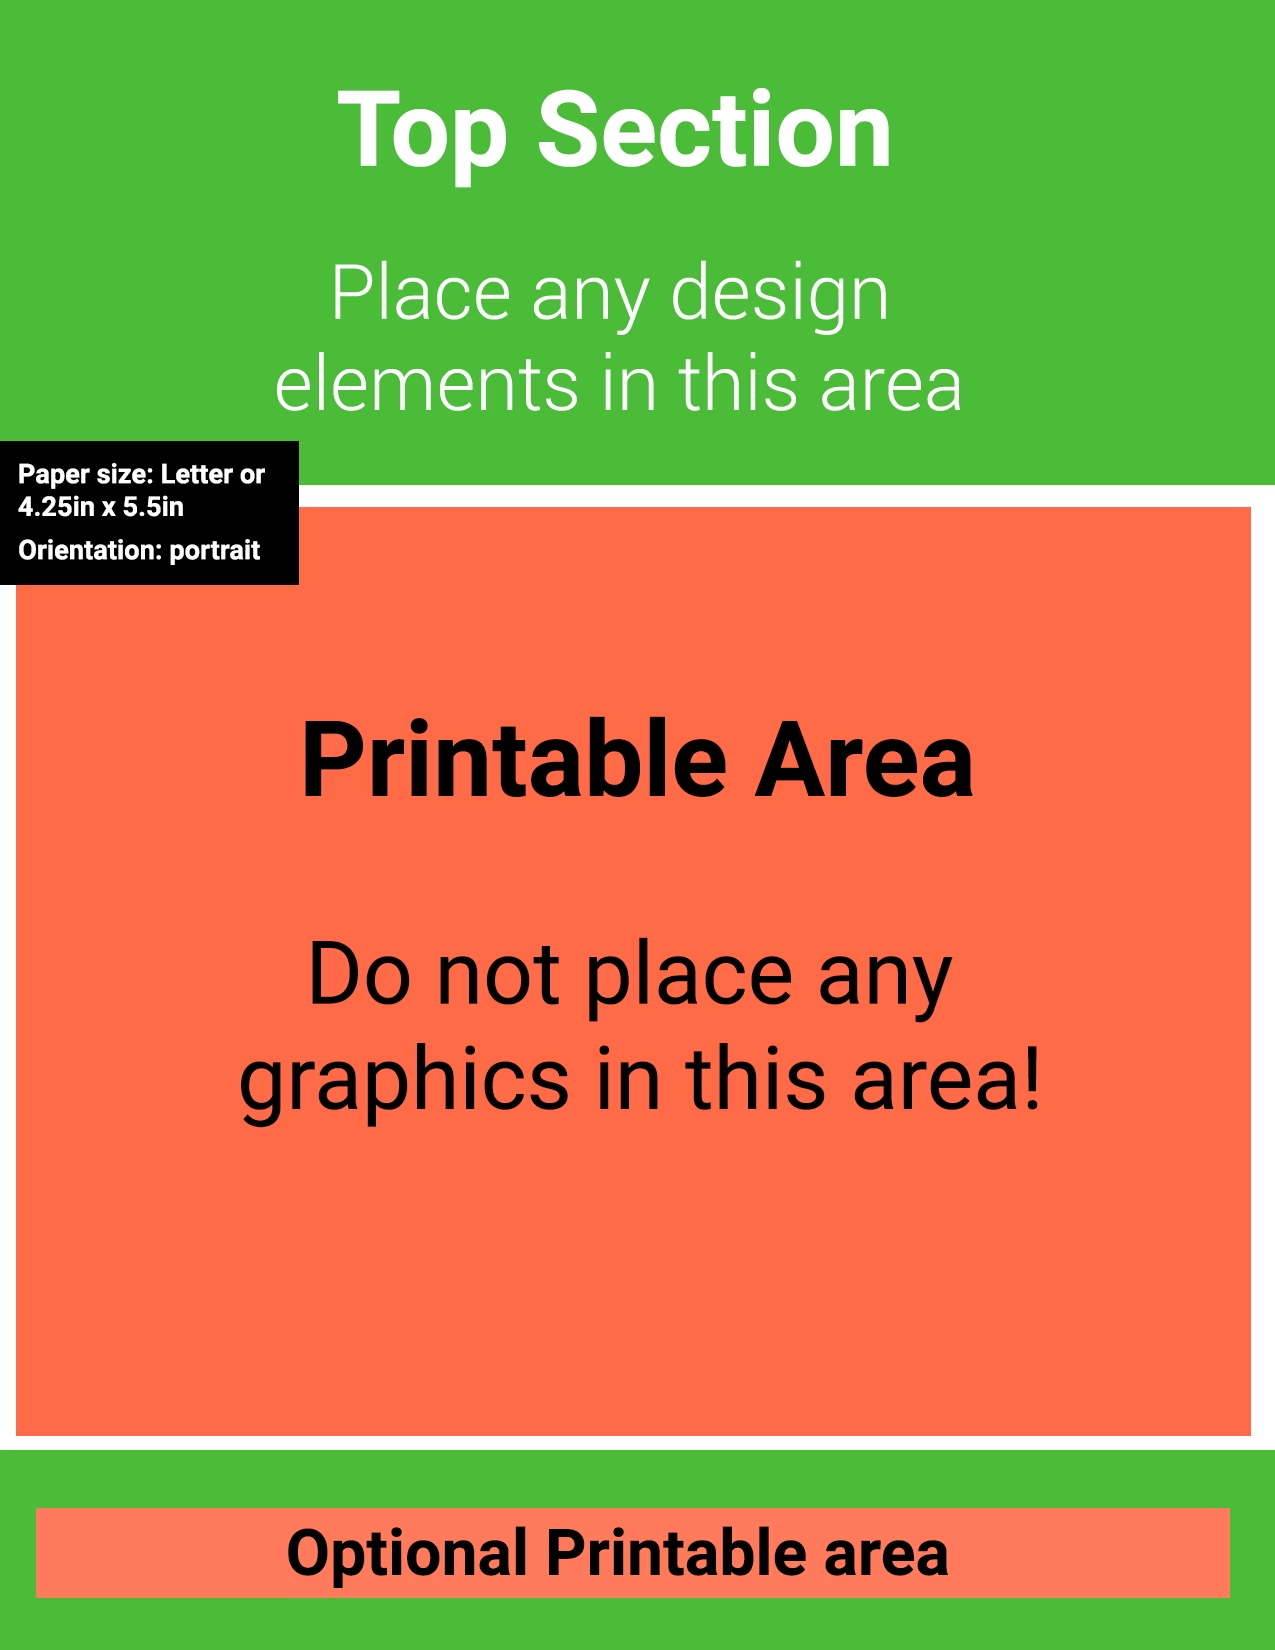
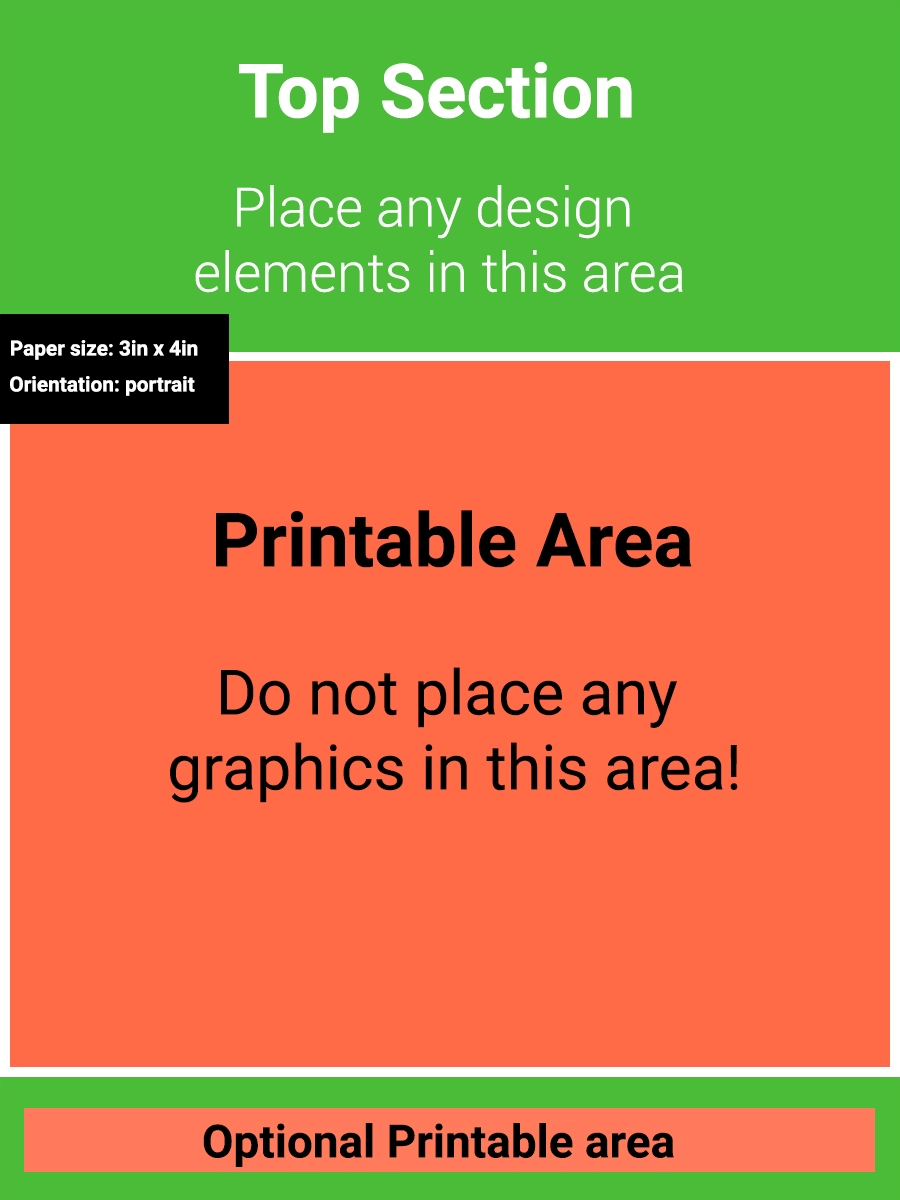
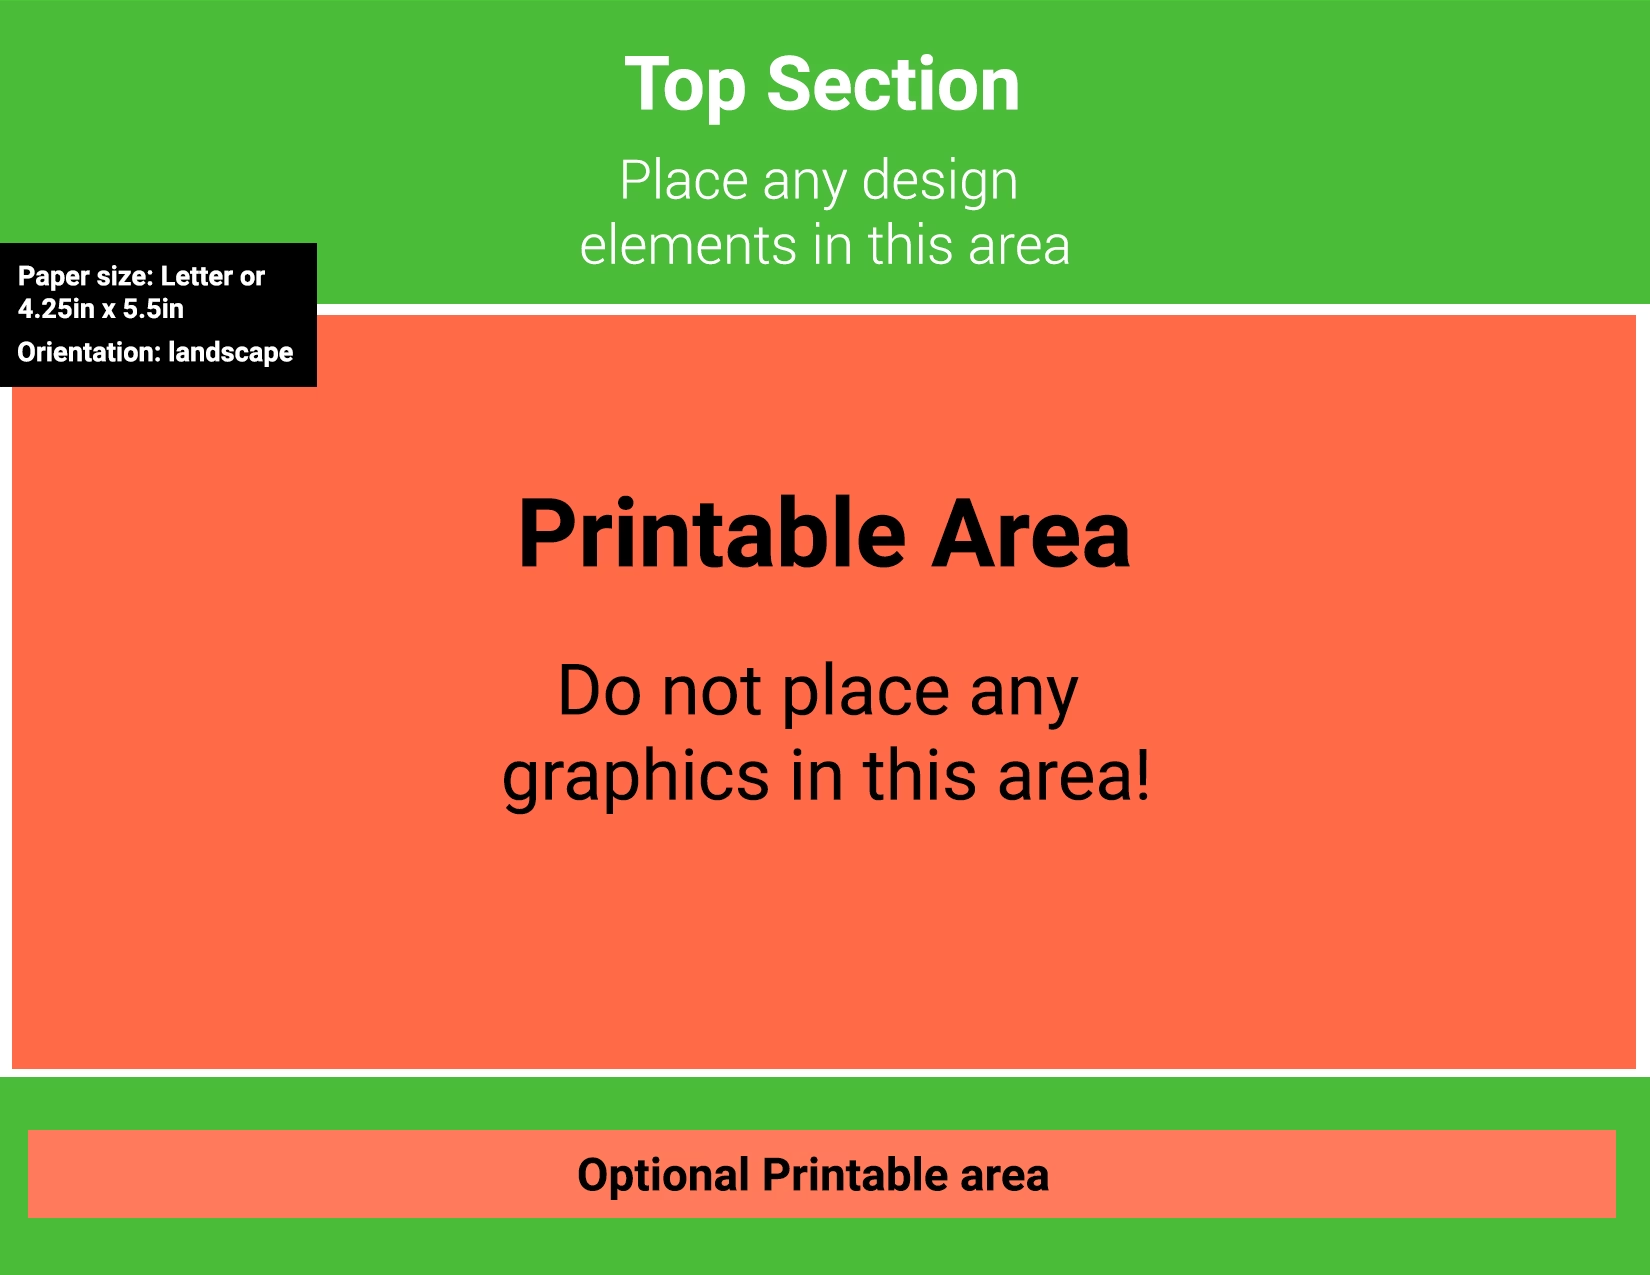
How to upload a custom background using a template
Create a custom background image. To create a custom background image, use our template provided next to the download image box. This template will guide you on the background image layout for successful printing. Choose your template based on format orientation and size. These are landscape or portrait and 3 x 4 inches or letter size (4.25 x 5.5 inches).

Optional steps
Add a Label
If needed, type in a custom label that will appear on the physical badge. You can adjust the font color by clicking Select Color.
If you leave this field blank, the badge name will be used.
See the example of two labels, below:
Note: This label can be disabled during the printing phase.
Print Badges
Once your badge is configured, print badges through the User Manager.
How to print badges
To start printing badges, go to User Manager.
From here, you can search for a specific user and quickly print an individual badge. If a user has purchased a product, a badge icon will display to the right of the delete icon, as seen below.

To print multiple badges, go to User Manager > Print Badges.

After selecting Print Badges, a pop-up will display, allowing you to review your badge information, filter the badges you would like to print, select which details you want to display, and allow you to download or export.

Note: Before continuing, review your badges and ensure your image and sizes are correct by heading to Badge settings.
Filter Badges for Download
Then, select which badges you would like to export or download. You can print badges for All attendees or only the Selected attendees (choose specific users). You can also filter by Product to target particular groups.
Select Badge Information
After you have selected your badges, check off the information you want to appear on the badges, such as Name, Title, Company, Ticket Name, and QR Code.
See the example below.
How will my badge download be formatted?
Before downloading your badges, decide how you want them formatted. If you check the Print Badges Individually option, each badge will be saved as a separate file, which is perfect for printing one at a time or if you need individual files.

If you leave this option unchecked, multiple badges will be arranged together on the same page, making it easier to print several badges at once on a sheet of paper. This option is ideal if you’re printing in bulk.

Download PDF or Export CSV
Click Download PDF to save them as a PDF, or select Export CSV to download the data for external use.